Vertical blinds can be a brilliant fit for a conservatory because they handle light direction, privacy, and airflow in a way that horizontal blinds often struggle with. In a conservatory, you’re not just working with flat walls—you’re dealing with angled glazing, slim frames, changing temperatures, and condensation that can make poor installations wear out faster.
I’ve fitted and helped homeowners with blinds where a small detail—like choosing the right fixing point or aligning the track level—makes the difference between blinds that glide for years and blinds that scrape, drift, or won’t close properly. If your conservatory feels bright and hard to control, vertical blinds are one of the most practical upgrades you can make.
Before you start, it’s worth noting that conservatories vary hugely: some use uPVC and aluminium frames, some have timber, and many include roof-to-wall transitions or fixed light panels. Take your time with measurements and plan the track route carefully so the blinds look neat and function smoothly.
What makes vertical blinds a good choice for conservatories
Vertical blinds are designed for large openings, and conservatories often have exactly that. When the track runs smoothly and the vanes hang evenly, you get a controlled view without blocking too much natural light.
They’re also forgiving on tall glazing. In day-to-day life, you can tilt the vanes to reduce glare while keeping a view out, and you can draw them fully for privacy when needed. If you’re setting up a conservatory as a dining room, a workspace, or a cosy reading space, that flexibility matters.
Common advantages people notice quickly include:
- Better glare control than many roller blind styles.
- Clear sightlines when vanes are angled rather than fully closed.
- Easy cleaning access because the vanes can be tilted and wiped.
- Adaptability to different frame configurations, including uPVC and aluminium.
One more point: conservatories are notorious for temperature swings. Vertical blinds tend to cope well when you allow for slight movement and avoid over-tightening fixings into fragile frame sections.
Before you measure: check your conservatory frame type
Most fitting problems come from treating every conservatory window or door as if it’s the same. The track needs a stable surface, and in a conservatory that usually means the glazing frame or a suitable surround rail.
Start by identifying what the vertical blinds will sit against. Look closely at:
- Material: uPVC, aluminium, painted timber, or mixed.
- Surface depth: is there enough flat area for the bracket screws?
- Glazing type: some frames have weather seals or raised trims that can foul the track.
- Whether panels open: if you have a door or casement, you must avoid any parts that collide.
If you’re not sure which fixing method suits your windows, it helps to compare with other blind types fitted to conservatory frames. You may find similar frame-related issues discussed in how to fit venetian blinds in a conservatory, especially around measuring inside edges and choosing secure fixing points.
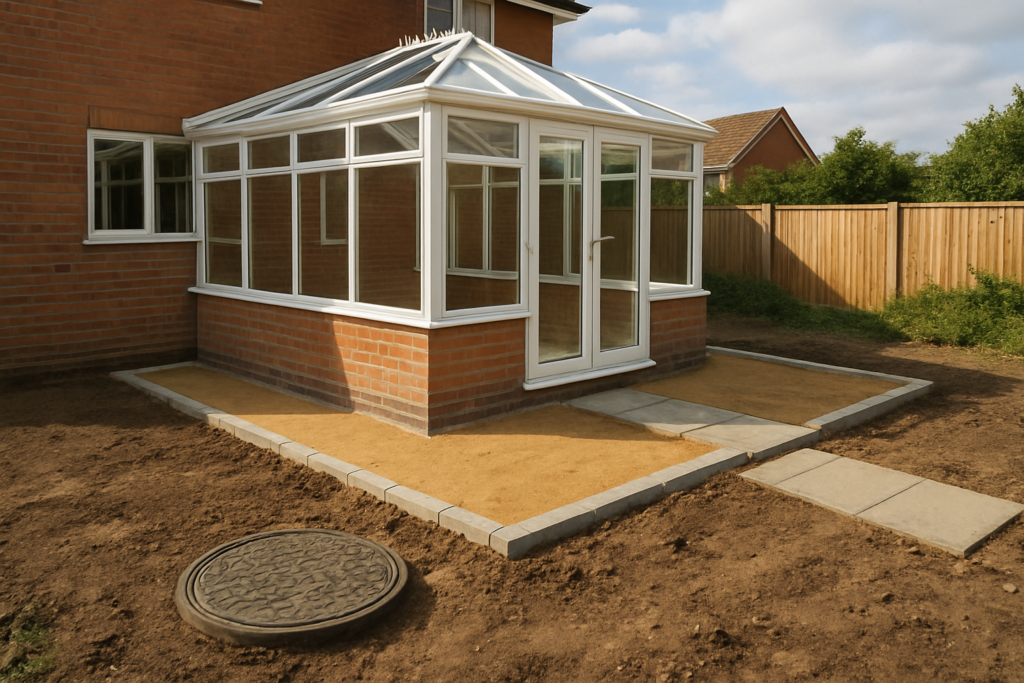
Also, take a moment to look at your base and drainage situation. While it’s not directly related to blind brackets, conservatories that have ongoing damp or settling issues often show subtle misalignment in frames. If you suspect movement, reading about whether your conservatory needs foundations can help you understand the bigger picture.
Tools and materials you’ll need
Having the right kit saves time and reduces the odds of damaging the frame. Most vertical blinds installs are straightforward, but conservatory frames can be harder to drill than you expect.
Gather:
- Measuring tape (preferably metal) and a pencil.
- Spirit level for checking the track line.
- Drill with suitable bits for your frame material.
- Screwdriver and the fixing screws supplied with your blind.
- Step ladder if you’re fitting above head height.
- Masking tape to protect the frame while marking.
- Cleaning cloth to remove dust before fitting brackets.
Optional but useful:
- Plastic shims if the bracket spacing needs micro-adjustment.
- Vacuum for removing drill debris from uPVC channels.
- Gloves to protect hands when handling vanes.
Try not to use generic fixings if your blind kit specifies particular screws. Manufacturers often select screw sizes that suit the bracket design and the expected loads.
How to measure for a perfect track fit
Measuring is where most conservatory blind jobs are won or lost. A track that’s even 5–10mm out of line can cause vanes to overlap unevenly or drift when you operate the control cord.
Decide whether you’re fitting the blinds:
- Inside recess (track sits within the frame opening).
- Outside recess (track sits on the frame surround for a wider coverage).
Conservatories often have angled or irregular trims, so it’s usually safer to choose the route that provides the straightest mounting line. If your track follows a slight angle because the frame is not square, you’ll see it every time you close the blinds.
Use these practical measurement habits:
- Measure width in two or three points across the opening, then use the narrowest measurement if the frame isn’t parallel.
- Measure drop length carefully and allow for the vane length and chain/weight mechanism.
- Double-check interference with window handles, trickle vents, and any decorative trims.
If you’re fitting to a large span, consider whether you can break it into manageable sections. Long tracks can sag slightly if brackets are too widely spaced, which is why spacing rules in the kit matter.
When you order or cut vanes, remember that conservatories can feel warmer in sun. Slight seasonal shrinkage or expansion can be more noticeable if you’ve left no margin at the bottom.
Choosing where to fix the brackets in a conservatory
The bracket position affects how smoothly the vanes hang and how reliable the track operation will be. In conservatories, the most common bracket failures come from fixing into weak trim sections or drilling through areas that are likely to split.
Aim for:
- Solid frame sections rather than thin decorative casings.
- Flat, clean mounting surfaces free from sealant ridges.
- Consistent bracket spacing as per the blind instructions.
If your conservatory has uPVC trims with internal recesses, don’t assume a short screw is enough. Short screws may fail to grip fully, while long screws can penetrate into unwanted areas. When in doubt, check the thickness of the mounting surface before committing.
For many homeowners, the simplest approach is to fix to the frame surround or a purpose-made head rail, rather than trying to attach to the glazing itself. If your conservatory has multiple openings, plan whether you can mount brackets to a continuous rail for a cleaner look.
Preparing the track and checking alignment
Even when measurements are correct, track alignment is essential. If the track isn’t level, vertical blinds will pull to one side and may leave inconsistent gaps along the edge.
Dry-fit the track components where possible. Before drilling, hold the track in position and confirm:
- Clearance from any handles or opening lights.
- Bracket line looks straight when viewed from both inside and outside the room.
- Operation space for the wand or chain control.
Use the spirit level along the intended mounting line. In conservatories, the roof pitch or side wall angles can trick you, so it’s better to check the actual line rather than rely on how the room feels.
If you notice the mounting surface isn’t level, a small shim at one bracket can fix the issue. Avoid bending the track by forcing it into a misaligned position because that can create stress and shorten the track’s life.
Fitting the brackets and installing the head rail
Once you’re happy with the alignment, mark bracket positions with a pencil and masking tape. This helps you drill accurately and avoids scuffing the uPVC or aluminium finish.
Drill slowly and steadily. Conservatory frames can be harder than expected, and rushing increases the risk of slipping or cracking plastic trims. If you hit resistance, stop and reassess rather than pushing ahead.
As you fit brackets:
- Start with the first bracket, then fit the rail lightly and re-check level.
- Fit remaining brackets while keeping the rail in position.
- Tighten firmly but not aggressively to avoid distorting the frame or bracket holes.
After the head rail is installed, test the smoothness of the control mechanism before loading vanes. It’s much easier to correct issues now than after everything is assembled.
Depending on your blind type, there may be a side control guide. Ensure it sits correctly so the carriers move without friction.
Hanging the vanes: getting spacing and drop right
Once the track is fixed, you can hang the vanes. This is where you’ll notice any earlier alignment problems because the vanes will either line up neatly or fan out unevenly.
Handle vanes carefully, especially if they’re wider or made from fabric with a printed pattern. If you’re installing blackout or thermal vanes, take care not to crease them during assembly.
Work through:
- Attaching carriers in the correct order and direction.
- Ensuring consistent spacing so the vanes overlap evenly when closed.
- Checking drop length after the first few vanes, not after all of them.
Drop length matters in conservatories because you may have a decorative skirting or a door threshold nearby. A vane that’s slightly too short can leave an obvious gap, while one that’s too long can catch on the floor or collect dust.
If trimming is required, measure the cutting line carefully and keep the vanes aligned. Uneven trimming looks worse in conservatories because daylight highlights small differences.
Operating and final adjustments for smooth movement
After assembly, cycle the blinds open and closed several times. Listen for scraping, check whether vanes meet evenly, and ensure the control cord or wand moves freely.
Make small adjustments where necessary. For example:
- If vanes overlap unevenly, the rail line may be slightly off or brackets may need micro-adjustment.
- If vanes drag, check for interference with a seal, trim, or nearby handle.
- If the control seems stiff, inspect the carrier alignment rather than forcing the wand.
It can be tempting to fully tighten everything once the blinds “seem okay”. Don’t. Conservatories settle and frames can shift slightly over time, so re-check the rail after a day or two of use.
For fabric or vinyl vanes, avoid cleaning or handling while the blinds are under tension. Let them hang naturally, then straighten vanes if they’ve been shipping-warped.
Common mistakes to avoid in conservatories
Conservatories bring a few unique installation challenges, so it’s worth knowing what usually goes wrong. The good news is that avoiding these issues typically leads to a smooth installation.
Here are the most common mistakes I see:
- Fixing brackets into weak trim that can crack or flex over time.
- Measuring only once across the width, ignoring that frames can be slightly out of square.
- Assuming the mounting line is level when a conservatory frame may sit on an angled surround.
- Over-tightening screws, which can distort the bracket and cause rubbing.
- Leaving no clearance for window handles, vents, or opening lights.
Another frequent oversight is thinking only about the look. Function matters: if vanes don’t align correctly, you’ll be tempted to “help” them with your hand, which wears out carriers sooner.
If you’re also planning other improvements, it helps to keep the whole space in mind. For example, if you’re upgrading privacy and temperature control, you might also review how you handle roof heat and light when choosing blind types. The right combination can make the room feel far more comfortable.
Benefits and limitations to expect
Vertical blinds offer plenty, but they’re not a magic solution for every conservatory situation. Being realistic helps you select the right style and avoid disappointment.
Benefits often include:
- Controlled light without losing all daylight.
- Flexible privacy by angling vanes rather than fully blocking.
- Practical cleaning compared to many heavier curtains.
- Good suitability for wide glazing and double doors.
Limitations to keep in mind:
- Track visibility can be more noticeable in minimal-frame designs.
- Condensation management still matters; wipe vanes and check carriers if damp builds up regularly.
- Angled or complex glazing may require custom track positioning or alternative blind styles.
- Dust and pollen can settle on vanes, so you’ll want a simple cleaning routine.
If your conservatory is heavily glazed and you’re sensitive to glare, consider how often you’ll angle the vanes. Frequent adjustments are fine, but it’s worth choosing a smooth control mechanism and keeping the track free of debris.
Maintenance tips for longer-lasting vertical blinds
In a conservatory, maintenance pays off because you’re exposed to more outdoor air, more pollen, and more temperature variation. The aim is to keep the carriers moving freely and prevent dust build-up in the track.
A simple routine might involve:
- Dusting vanes with a soft brush or microfiber cloth regularly.
- Checking the track once every few months for debris.
- Wiping condensation on nearby glazing so moisture doesn’t spread to the blind components.
- Gentle cleaning of vanes according to the manufacturer’s guidance.
If you’re also keeping the conservatory overall clean, you may find the process of maintaining the roof helpful. For example, how to clean a conservatory roof can be useful because dirt and grime often affect how much light enters and how visible dust becomes on blinds.
When cleaning, avoid soaking carriers or saturating the track. Most issues that look like mechanical faults are actually dust or residue restricting movement.
What we get asked… (FAQ)
Can I fit vertical blinds to an angled conservatory wall?
Often you can, but only if you can mount the track on a suitable straight mounting line. If the surrounding frame is severely angled, a custom track or a different blind style may be the safer option.
Will drilling into uPVC damage the frame?
It shouldn’t if you drill carefully, use the right bit, and fit bracket screws in the correct locations. Avoid drilling into thin decorative trims, and don’t over-tighten because uPVC can distort.
How do I stop the blinds from drifting to one side?
Check that the head rail is level and that brackets are evenly spaced as specified by the manufacturer. Also confirm there’s no interference with nearby handles or seals, and test the carriers for smooth movement.
Can I shorten the vanes?
Some vertical blind systems allow vane trimming, while others require ordering the correct drop length. Follow the manufacturer’s instructions for your specific vane type so you don’t compromise the weights or stitching.
What’s the best way to clean vertical blinds in a conservatory?
Dust regularly with a microfiber cloth, then wipe vanes using a cloth dampened with mild cleaner if the material allows it. Don’t soak the track area, and keep an eye on damp build-up around glazing.
Our Final Thoughts
Fitting vertical blinds in a conservatory is one of those jobs where good preparation really shows in the finished result. When you measure carefully, choose the right fixing points, and keep the track level, you’ll get blinds that glide smoothly and look tidy against your glazing.
If you’re unsure about your frame material or bracket placement, pause and check the blind instructions against what you can see on your conservatory. You’ll feel much more confident after a careful dry-fit and alignment check.
Ready to move forward? Gather your measurements, confirm your mounting approach, and choose vanes that suit your light control needs—then fit the track with patience so your conservatory blinds work beautifully for years.